
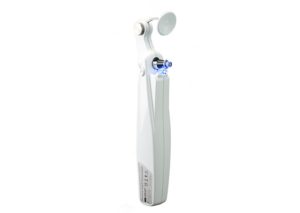
A lot of the principles for the Perkins tonometer ring through from the procedure for Goldmann tonometry as it is essentially a hand held, battery powered version. The same probes are used, therefore the principles with regards to the mires and troubleshooting remain the same. Disinfection processes are also the same.
Perkins is most appropriately used for patients who cannot reach a slit lamp or for domiciliary work. A slit lamp mounted Goldmann would always be first choice if both are available for the patient.
Below is information with regards to calibration and procedure.
Perkins service and calibration
As for the slit lamp mounted Goldmann, annual service is a must for regularly used tonometers. For a Perkins tonometer it is possible to check calibration yourself, but this is regarded as only a ‘rough’ calibration. If you have reason to believe the tonometer is reading inaccurately, it is best to send for servicing and re-calibration.
- Fix the tonometer probe into the probe holder (cone arm).
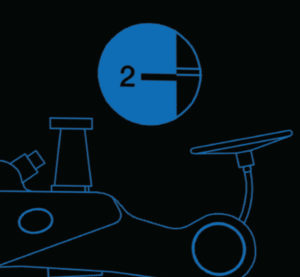
- Turn the tonometer on by turning the measurement wheel, and set it as one mark before 2 (the 20mmHg mark)
- Place the tonometer on its back and balance the calibration disc on top of the tonometer probe (see image).
- The cone arm should be in its lowest position.
- Gently turn the wheel so it is one mark after the 2 (the 20mmHg mark).
- The movement of the wheel should cause the cone arm to move up if the tonometer is calibrated correctly.
Perkins Procedure
- As per slit lamp Goldman tonometry, explain the procedure to the patient and set the patient up.
- Using the wheel at the very top of the tonometer, unscrew to release the forehead support. Release a suitable length of the support arm so that you can place it on the patient’s forehead and then drop the tonometer onton the eye. Tighten the wheel to secure.
- Instill your chosen topical anaesthetic and fluorescein combination.
- Turn on the tonometer by turning the measurement wheel. The tonometer has an internal light source which will light up cobalt blue if it is operating correctly. Set the dial to 15mmHg.
- Instruct the patient to fixate a distant object. Explain that you may get in the way, but to keep looking forwards.
- Place the forehead support onto the patient’s forehead and secure with one hand.
- Slide the tonometer probe down onto the cornea, then turn the wheel to check the measurement – you need quite a steady hand for this!